El medievo me reclama

"Patrón" camisa margomanda

Al final he decidido rematar provisionalmente la saya encordada para poder ir vestida a las justas de Hospital de Orbigo 🙂 Eso quiere decir que las sisas, cuello y bajo serán descosidos y rehechos en un futuro cercano (seguramente durante agosto y septiembre, en cuanto aprenda a tejer con cartones ^_~). De momento lo que he hecho ha sido coser los ojetes en lino blanco para que vayan a juego con la decoración y sean más resistentes (casi me corto los dedos cosiendo, ya te digo si resiste el hilo de lino XD) y rematar cuello y sisas simplemente haciendo un dobladillo sencillo y cosiendo con hilo verde y punto de hilván para que sea más fácil de descoser y quede la puntada de decoración. La camisa también está casi terminada ya que la he cosido casi completamente a máquina (excepto el remate del cuello y los puños), y queda preciosa 🙂 El cordón con el que se va a cerrar la saya en el lateral lo estoy haciendo con algodón egipcio de crochet del nº 12, un poco fino pero era lo que tenía a mano 🙂 Estoy usando un tipo de anudado que explicó Racaire en su blog hace bastante, que es fácil y rápido de hacer (5cms en 2 minutos) y que parece resistente.
También estoy dudando si llevar o no velo. Como mujer soltera podría ir sin él (se me presupone doncella al no tener marido XD), pero está el tema de la edad, que no tengo claro si las solteronas iban «en cabellos» ^_~

¿Problemas que haya tenido? Que he ensanchado en el último año y no me queda justa en las caderas porque la abertura lateral me quedó demasiado larga, si no ahora mismo estaría teniendo que descoser y sacar algo de la costura. También al hacer las pruebas me he dado cuenta de que este tipo de trajes no se pueden vestir con sujetador porque se marca ^^;

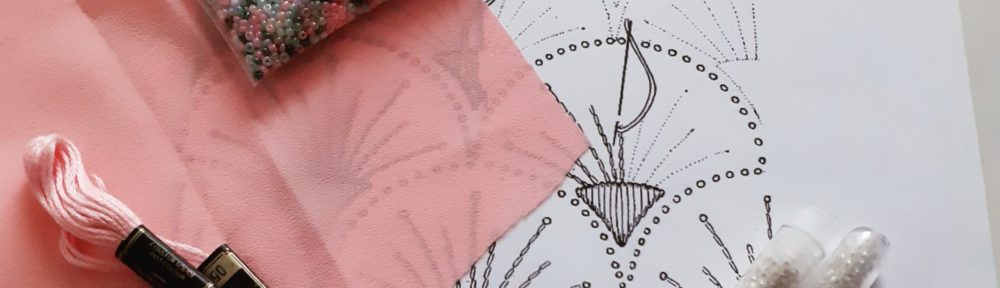
Desgraciadamente, el pasarme el fin de semana cosiendo ha hecho que no pueda hacer fotos para enseñar, y ya lo he dejado para cuando esté todo terminado y lo pueda enseñar puesto. Pero para que esto no quede sólo con texto y soso, os dejo una muestra de cómo ha sido el «patronaje» de la camisa (el trozo gris es cartón de un paquete de cereales) XD

Media bata

Media bata

Había tenido este proyecto abandonado mientras trabajaba en otras cosas, pero al final he podido volver a ponerme con él y está casi acabado.

La enagua y la falda han sido fáciles de hacer porque llevan el mismo patrón y ya había hecho las de la polonesa.

Para la media bata propiamente dicha el patrón es el mismo que el de la cotilla verde, pero transformado: primero monté una mitad en papel, le hice una sola costura en el lateral y añadí entre las costuras laterales y la de la de la espalda suficiente ancho para hacer los pliegues de las caderas y de la espalda, según los patrones de Patterns Of Fashion 1 para el forro y el exterior. Lo difícil aquí fue pensar cómo montar el forro en la media bata, porque la técnica es bastante diferente de lo que se hace hoy en día; por suerte encontré unas explicaciones en la web de Koshka the cat (Blue printed cotton 1780s Gown) que servían para mi proyecto.
Ahora mismo aún me falta hacer los pliegues de la espalda, rematar el cuerpo y montar las mangas. Por suerte no tendré que hacer otro patrón para éstas últimas porque ya lo tengo gracias a un error en la polonesa (olvidarme de que el diseño llevaba manga larga y hacer una manga corta antes de darme cuenta XD).

Por cierto, al final decidí usar como forro tela de algodón blanca en lugar de la de cuadros que enseñé en el flickr porque era más fácil de controlar 🙂

Wrapping up the project

Finished polonaise

Flickr album (photos courtesy of Blanca Amores)

References used:

Books
• Moda. La coleccion del instituto de la moda de Kyoto. Varios. Ed. Taschen
• The cut of women’s clothes, 1600-1930. Nora Waugh. Ed. Faber and Faber
• Corsets and Crinolines. Nora Waugh. Ed. Taylor & Francis Ltd
• Seventeenth and Eighteenth-Century Fashion in Detail. Avril Hart, Susan North. Ed. V&A Publishing
• Patterns of fashion: v.1. Janet Arnold. Ed. Pan Macmillan

Extants
• IMATEX. Centre de documentacio i museo textil. (http://imatex.cdmt.es/)
o Jubon Ref:11531
o Cotilla Ref:11882
o Cotilla Ref:11883
o Cotilla Ref:11884
o Jubon Ref:11530
• Catalogo Museo del Traje CIPE. http://museodeltraje.mcu.es/
o Polonesa Inv. CE000592
o Polonesa Inv. MT000905

Websites
• Isis Wardrobe: polonaise pattern scan:  http://isiswardrobe.blogspot.com/2009/09/18th-century-curiousity.html
• Your Wardrobe Unlocked (subscription only):
– c.1775 Dress: The Bodice. Serena Dyer: http://yourwardrobeunlockd.com/component/content/article/412-c1775-dress-the-bodice
-Setting in 18th century sleeves. Katherine Caron-Creig: http://yourwardrobeunlockd.com/component/content/article/377-setting-in-18th-century-sleeves-by-katherine-caron-greig

¡Finished!

Shoulder decorations

I just finished yesterday night.

I finally was able to use pins to close the front of the polonaise, I’m really happy! 😀

The sleeves were easy to do and set when I finally decided to stop trying to adapt an existing pattern and draped them. I had to make them a little wider than I wanted so I could pass the hands, and I used beads and loops instead of buttons and buttonholes in the cuffs, so they looked part of the decorations.

Ref. 11531d - CDMT

The decorations are little crocheted chains made with silver embroidery thread, with beads instead of the little crocheted flowers in the original. Obviously my design is not so complicated as the one I used for inspiration 🙂

Tomorrow I’m going to do the photos for the entry, I’ll post the better here and the rest in mi flickr. Now just wish me luck with the contest! 🙂

The beginning of the end

Front of the polonaise

Very little work left!

I’ve had a lot of problems with the front closure. I can’t use pins, so I tried hooks and  eyes; it didn’t work. Finally, after much thinking I did it the period way, but instead of ribbon, I used embroidery thread to tie it closed. It was easy and it looks a lot better 🙂 Lining wasn’t so problematic as when I try to bagline something, 18th century lining techniques were more «intuitive», and with them I didn’t have any problem figuring out how to do the sleeves, that are the next I’ll be working on.

Finally, I begin the polonaise

Museo del Traje Polonaise: Nº INV. MT000905

The stays are finished (tomorrow I’ll post photos of the lining on my flickr account), and I’ve begun working in the last piece: the polonaise. The photo on the left is my model for this, and it’s been difficult finding a pattern that resembles it, so I’ve done it myself. I first draped the lining, but I made a mistake and cut it without seam allowance, so I only could use it to make a pattern. Then I made a pattern in paper for the rest of the polonaise and tried it on the doll. It was perfect except for the lengt and now I only have the pattern for the sleeves left to do, so… back to work!

Only the lining left!

Pair of bodies

This is how the pair of bodies are going to look like!

The binding was more difficult than I thought, so I just finished it this morning. Thankfully, I still have the rest of December and all January to finish this project, so I spect to have it in time for the contest.

Pair of bodies

Pair of bodies, almost finished

Pair of bodies, almost finished

I have almost finished the definitive pair of bodies. I only have left binding, welting and sewing the lining.

I’ve made a lot of mistakes  with it, I should have changed the pattern so the four back pieces where only two, because I almost hadn’t had space for the lacing holes. Regardless of all, it looks really good! I hope to have it finished by the end of the month (not a lot of time to work on it), so I can begin with the bodice.

Petticoat finished


Petticoat

Petticoat


I just finished the petticoat. It gave me some problems, because I used the pattern for the underpetticoat, but I forgot that it was shorter. Thankfully, it has a flounce and it gives it the length I need.Now I’ll finish the stays before I continue with the bodice, so I can get a perfect fit.

I only have one concern: ¿would the false rump be able to support all the weight of the three layers?

DPP Update!

Underpetticoat

Underpetticoat

I finished the underpetticoat. I can’t believe it looks so good! I had to use powder blue ribbon for the front tie because I ran out of white, and the result is very nice.

In the detail photo you can see how I attached the ribbon to the underpetticoat. The fabric I used unravels like mad, but I didn’t want the extra bulk I’d have with a hem, so I cut it and whip stitched ribbon and fabric together. The detail pic doesn’t look very neat, but in  reality it looks better.

Detail